Before the snow flies, it’s time to Winterize your Gas Grill. There are several easy steps you can take to ensure your grill is ready to be fired up come Spring.

While many of us enjoy grilling outdoors year round, for some of us the grilling season comes to an end when temperatures drop below freezing or the backyard is buried in snow. If you are not planning to grill during the winter months, now is the time to winterize your barbecue and pack it away for the season. Is your barbecue in need of repair? Get the compatible parts you need at Grill Spot! Not only will this help extend the life of the grill, but you’ll be all set for grilling when warmer weather returns.
5 Easy Steps to Winterize your Gas Grill
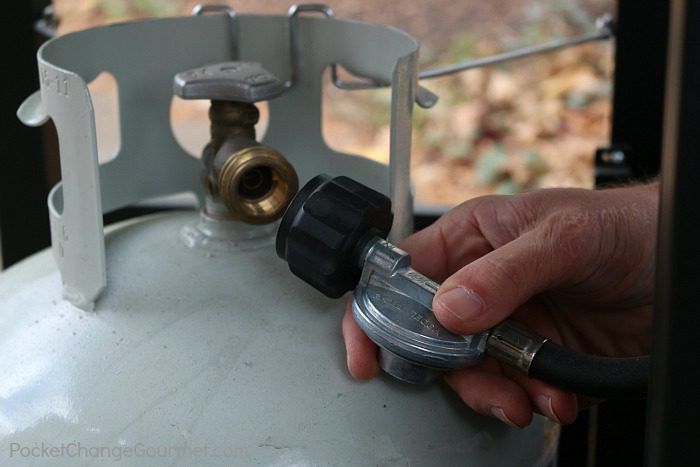
Make sure to disconnect the propane tank or natural gas line before starting.
- Give the grill a top to bottom cleaning:
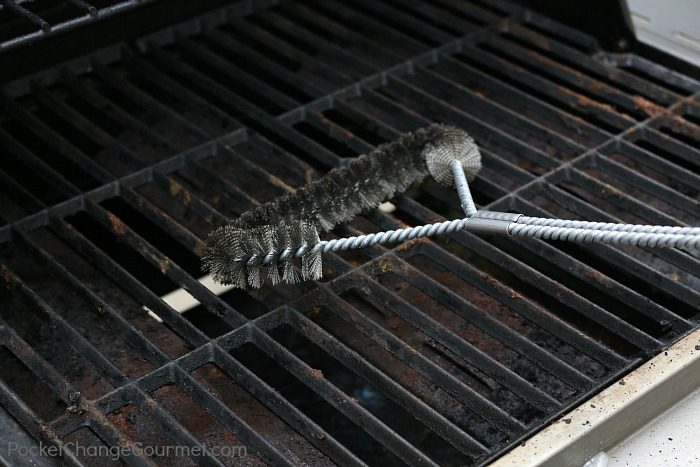
- Remove the cooking grates, heat plates, and warming rack and brush them clean as best you can with a wire grill brush. Then wash them in warm soapy water, rinse, and dry thoroughly.
- Remove the burners and set them aside. Scrape the inside of the burner box making sure to remove as much buildup as possible.
- Remove the drip tray and grease cup and wash them in warm soapy water, rinse, and dry.
- Wipe down the inside of the grill cabinet and remove any food particles, dirt, or leaves that have accumulated. Build up at the bottom of the grill cabinet will trap moisture and can accelerate deterioration.
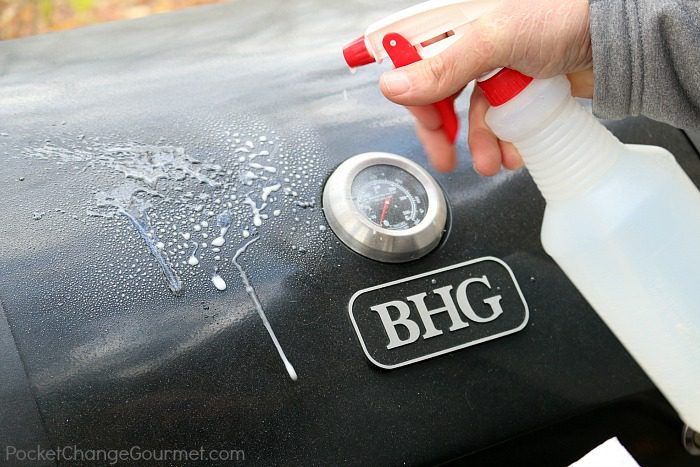
- Clean the outside of your grill using the mildest cleaning solution that will get the job done. If you have maintained the grill, you should only need a mixture of water and vinegar to clean anyway surface impurities. For tougher stains and spots, use a cleaner specifically designed for use on gas grills, following the manufacturer’s instructions.
2. Coat the cooking grates, heat plates, warming rack and burners in cooking oil to repel moisture and prevent rust. Burners can also be placed in a plastic bag to prevent any spiders or other insects from nesting in the burner tube itself, which can cause uneven cooking performance and flashback fires. Place the oiled parts back in the grill.
3. If your grill uses an electronic igniter system remove the battery before storing the grill to prevent corrosion of the contacts and the battery itself.
4. If you are storing the grill outside, reconnect the propane tank and make sure the valve is in the off position. If you are storing the grill inside a garage or shed, which is ideal, leave the propane tank outside, closed and in an upright position. NOTE: Propane tanks should not be stored inside your house, garage, or shed.
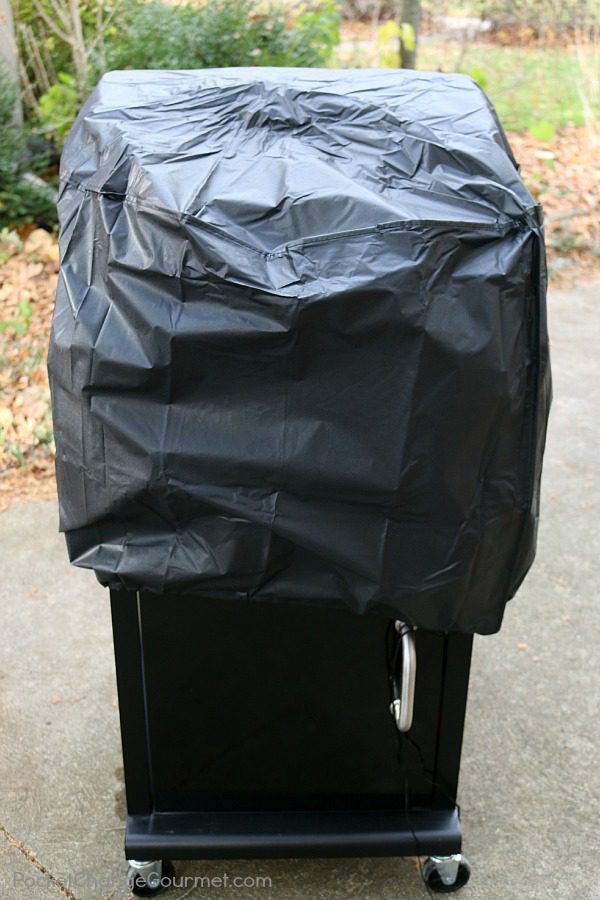
5. Last, but not least, cover your grill. A cover is one of the best investments you can make as it protects your gas grill from the elements any time of year. Do you need a BBQ cover? Get one now at Grill Spot!
That’s it. You’ve winterized your grill. And when the warm weather returns, you’ll be back to grilling in no time.
If your BBQ needs a full tune up, check out Griller’s Spot for maintenance and repair tips!
![]()


3 Comments
I’ve never thought about disconnecting the propane tank but it makes perfect sense. Nice safety tip man, thanks!
Great reminders for prepping the grill for storage. I’m not in a location where it gets cold enough to have to store it for the winter months, so I’ve not had to store it. Great idea about putting the burners in plastic bags to keep critters out. I’m going to share that with my Maine friends. Don’t need baby spider pouring out of the grill come spring!